We decorated our Christmas tree this week and I though my little girl would enjoy making a Christmas ornament kid craft.
I love to make crafts with paper plates because they are inexpensive and easy to get. They are already in a circle too. I made two different paper plate Christmas ornaments using Kwik Stix.
This Christmas ornament kid craft is great. It uses items you have at home and is quick and easy. Good for several ages.
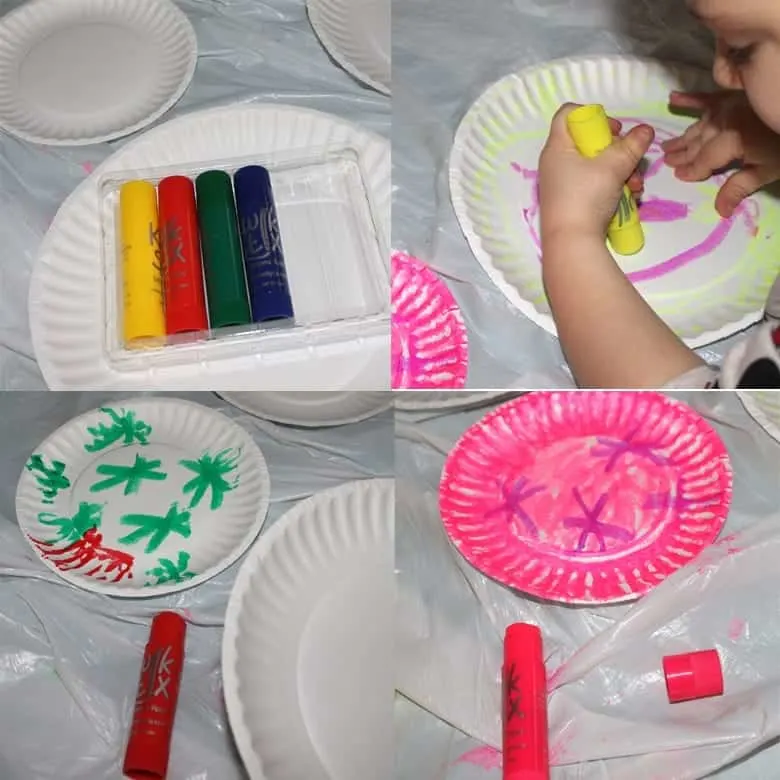
Kwik Stix are solid tempera paint that dry quickly. The are great because they are mostly mess free. I mean a toddler can get dirty with anything.
Tempera paint wash off of surfaces and clothes. The sticks are like drawing with a glue stick. They are great for covering large areas of color. Kwik Stix also come in thinner ones too.
Kwik Stix are available to buy
– online at their website, Michaels, & Amazon
-in-store at Walgreens & Michaels
There are affiliate links in this post. I will receive a small commission if you purchase through these links at no additional cost to you. I receive a free set of Kwik Stix in exchange for a blog post.
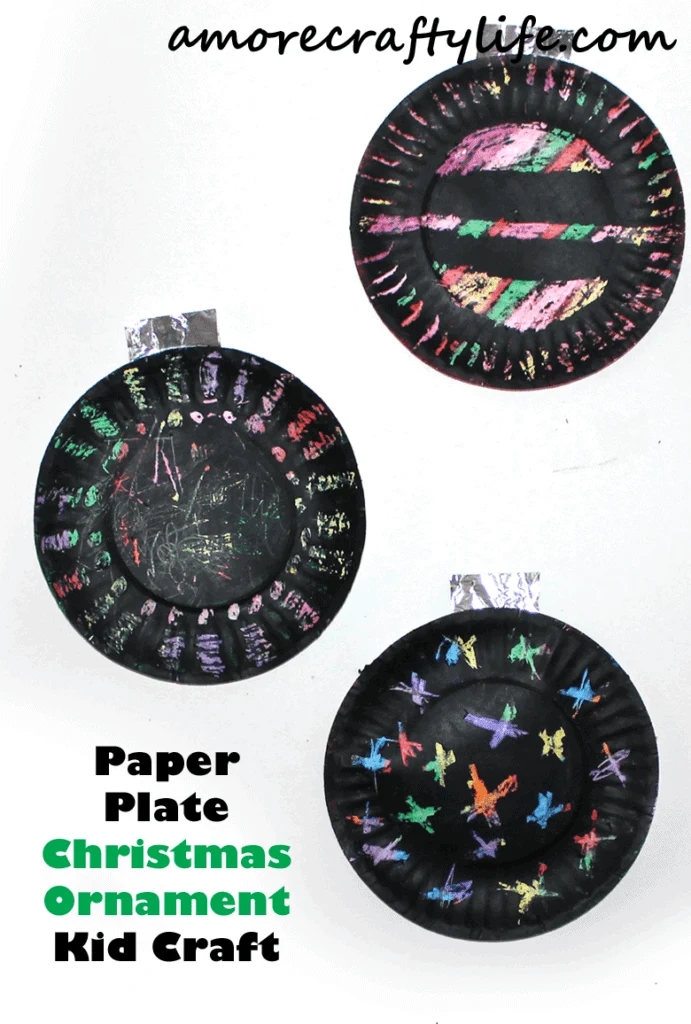
Paper Plate Christmas Ornament Kid Craft
Supplies
- paper plates – I used small and large size
- clear tape
- Classic Kwik Stix & Neon Kwik Stix or a larger pack of 24
- crayons
- aluminum foil
- wood skewer or other item with a point
- something to cover your work area - I used a plastic trash bag

Paper Plate Christmas Kid Ornament
Step 1. First flatten the plates some by pressing down and rubbing. You can also flatten them under a heavy book overnight. Next, color the paper plates with different patterns and colors.
We used both sets of Kwik Stix. I like the bright colors of the neon set. There is also a metallic set that I would to try, who doesn't like a little sparkle.

Step 2. Then tear off a piece of aluminum foil, 3 in tall. Next, fold it in half. We made the top of the ornament 2 ½ in wide for the large plate and 1 ½ in for the small plate. Tape to the back of the plate at the top of your ornament using the clear tape.

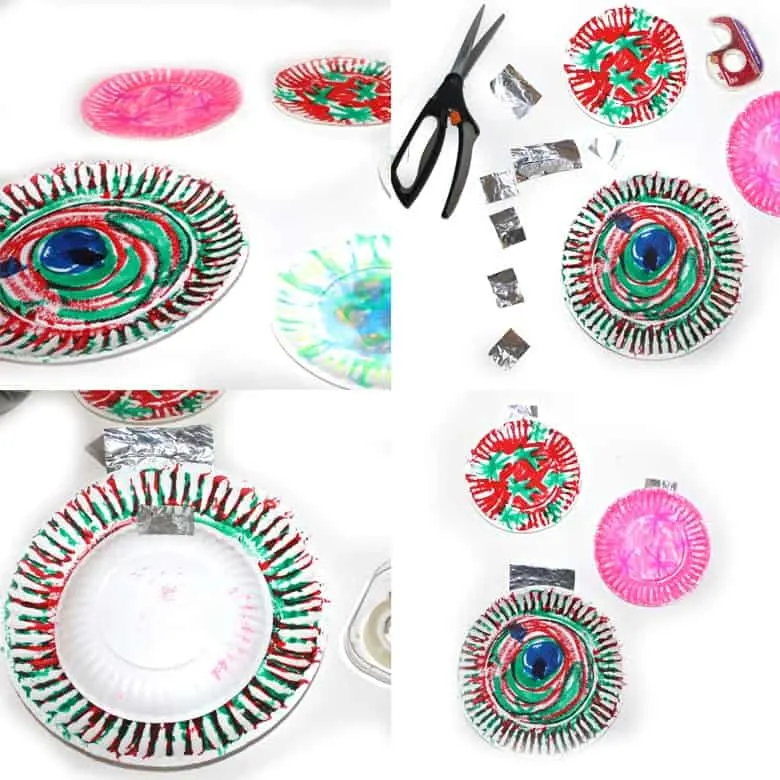
If you are going to hang on your tree, use several pieces of tape so they will hold up to hanging on the tree. Finally, poke a small hole with an ornament hanger and have your kids hang on the tree. Enjoy your Christmas ornament kid craft.

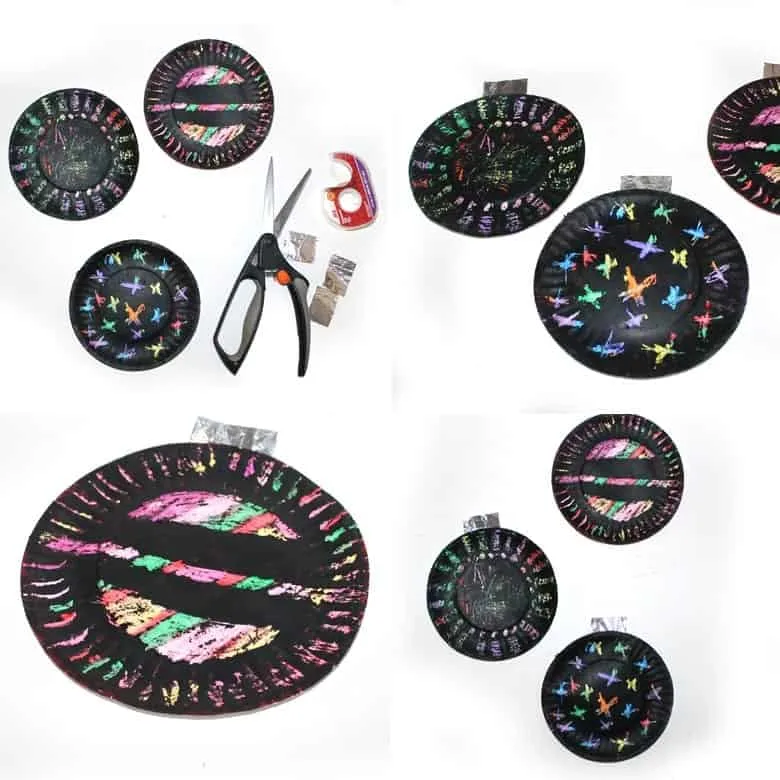
Scratch Paper Plate Christmas Ornament Kid Craft
Step 1. First take a flatten paper plate and color the entire plate with different colors of crayons. Press hard and color all of the plate for the best scratch results. Bright colors work the best.

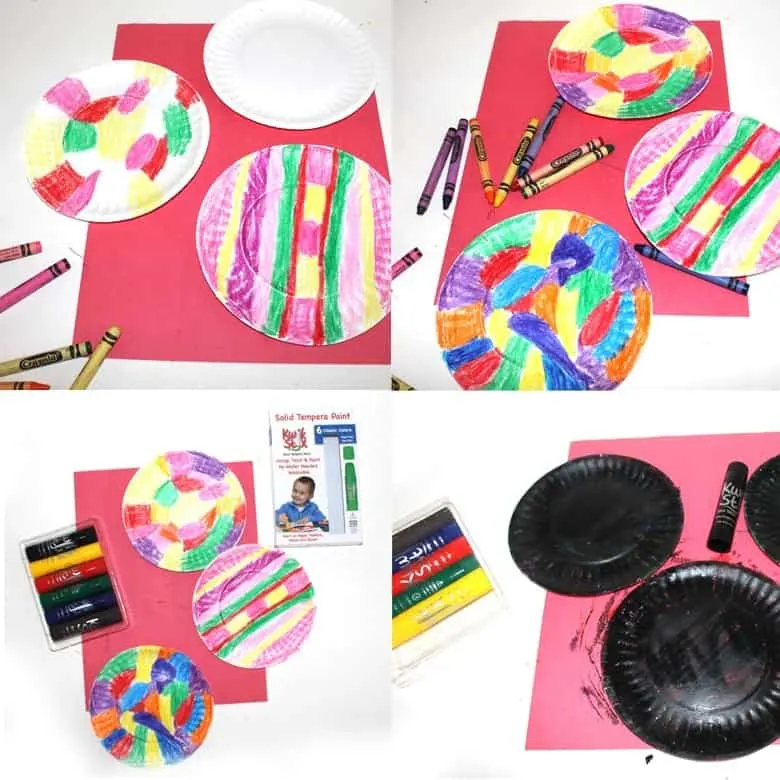
Step 2. Next, paint the entire paper plate with black stick. It took me 2 layers. Let the paint dry in between.
Step 3. After the paint is dry, use a skewer or another item with a pointed tip to make your designs. I used a mini screw driver. I have used a dull pencil and a paper clip before.
Step 4. Then, tear off a piece of aluminum foil, 3 in tall. Then, fold it in half. We made the top of the ornament 2 ½ in wide for the large plate and 1 ½ in for the small plate. Tape the foil to the back of the plate at the top.
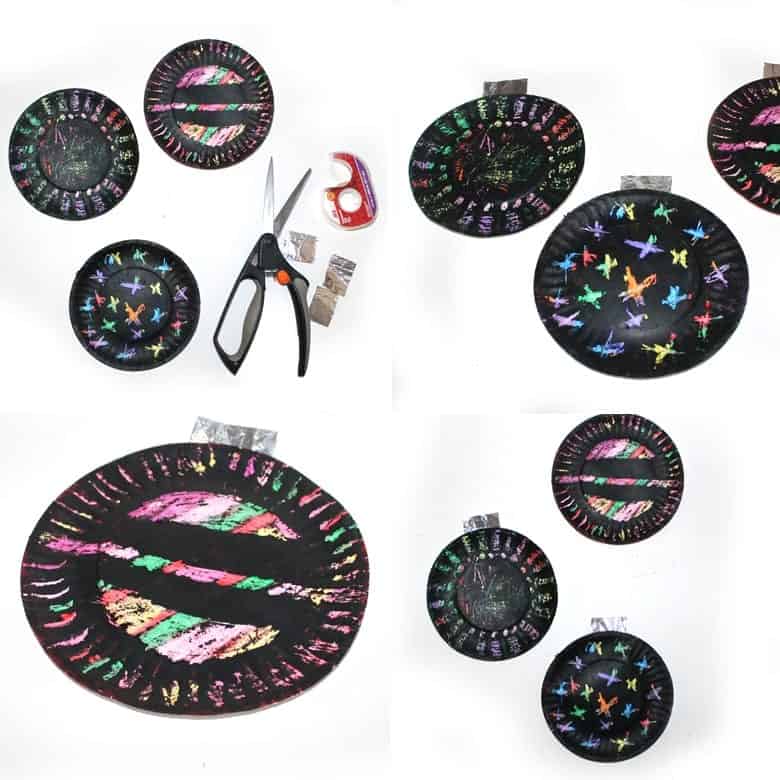
If you are going to hang on your tree, use several pieces of tape so it holds up to hanging on the tree. Finally, put a small hole with an ornament hanger and have your kids hang on the tree.


Pair this fun craft with some Christmas books for learning and creating together.
Pin for Later

Christmas Crafts for Kids
- 31 Christmas Ornament Kid Crafts – Crafting Fun
- Christmas Kid Crafts
- Reindeer Kid Crafts
- Christmas Tree Crafts
- Santa Kid Crafts
- Wreath Kid Craft
- Elf Kid Crafts
- Gingerbread Crafts
- Christmas Ornaments
- Angle Kid Crafts
- Paper Plate Christmas Ornament Kid Craft
- Tissue Paper Christmas Tree Craft
- Fingerprint Christmas Tree Craft
- 21 Fun Christmas Popsicle Stick Crafts
- Christmas Kid Crafts
- Paper Plate Christmas Crafts for Kids
- Fun Toilet Paper Roll Christmas Crafts for Kids
- Reindeer Kid Crafts
- Christmas Tree Crafts
- Santa Kid Crafts
- Wreath Kid Craft
- Elf Kid Crafts
- Gingerbread Crafts
- Christmas Ornaments
- Angel Kid Crafts
- Paper Plate Christmas Ornament Kid Craft
- Tissue Paper Christmas Tree Craft
- Fingerprint Christmas Tree Craft
- Wood Rudolph Ornament Craft
- Fun Tin Foil Ornament Craft
- Printable Poinsettia Craft for Kids Template
- Wood Rudolph Ornament Craft
- 13 New Year Crafts
Winter Kid Crafts
- Winter Kid Crafts
- Penguin Kid Crafts
- Snowflake Kid Crafts
- Snowman Kid Crafts
- Winter Activities – Math & Reading
- Fingerprint Snowman Kid Craft
- Arctic Kid Crafts
- Tissue Paper Winter Tree Craft


I have been crocheting since I was 8 years old. I have 40 plus years of experience. My blogging journey started in 2013 and I have been writing about crafts and crocheting since then. I started blogging full time in 2019.